")

For boaters, dings and scrapes are almost inevitable. Whether it’s a minor gouge from docking too quickly or a chip caused by a rough day on the trailer, small paint and gelcoat damage can happen to even the most careful captains. Recently, The Log discussed how to refresh your boat’s paint job in our article “Brush Up Before You Splash Down: Pre-Summer Painting Tips to Get Your Boat Looking Its Best.” But what happens when an unexpected scrape or crack pops up mid-season and you don’t have time to schedule a full repair? That’s where a quick-fix paint kit comes in handy.
Think of it as a “band-aid” for your boat’s hull or deck — a temporary solution to keep moisture out and prevent further damage until you can tackle a more comprehensive repair. While most liveaboard boaters likely have these supplies on hand, it’s a good idea for all boaters to keep a small kit stashed in a sealable tote or milk crate for those quick touch-ups that can keep your boat protected in the meantime.
What to Include in Your Quick-Fix Paint Kit:
Acetone, Denatured Alcohol, and Paint Thinner: These essential cleaning agents will help you prep the area before applying any filler or paint. Removing grime, salt, and debris ensures that your touch-up will adhere properly.
Rags and Old T-Shirts: Keep a handful of these on hand for wiping away excess filler or cleaning surfaces and brushes. Old T-shirts work just as well as expensive rags and are easily disposable.
Paint Stir Sticks and Tongue Depressors: These are perfect for mixing filler products or small amounts of touch-up paint. Having a few on hand will keep things tidy and prevent cross-contamination.
5-in-1 Paint Tool and Wire Brush: A multi-functional tool like the 5-in-1 paint tool can scrape away old paint, spread filler, or clean up edges. A wire brush will help clear out any debris or rust in the damaged area.
Putty Knives in 1/2″ and 1″ Sizes: Flexible putty knives are essential for applying filler in small areas. The 1/2″ size is great for tiny dings, while the 1″ is ideal for slightly larger gouges.
Mixing Buckets from West Marine: West Marine offers a variety of plastic mixing cups with printed measurement ratios, making it easy to mix paint or filler in small batches. Avoid using paper cups, as some chemicals can soak through.
Assorted Paint Brushes (1/2 to 3″) and Chip Brushes: Keep a range of sizes to match different repair areas. Chip brushes are inexpensive and ideal for rough, quick touch-ups, though they won’t provide a perfect finish.
1″ Blue 3M Masking Tape: Look for long-term, easy removal adhesive tape that allows for clean lines and won’t leave residue behind. Perfect for masking off areas before painting.
Sandpaper in Various Grits (80, 120, 220, 300): Start with 80 grit to remove rough edges and work your way up to 300 for a smoother finish. Keeping a variety of grits allows you to handle everything from initial sanding to final smoothing.
Evercoat Formula 27 Filler: A staple for quick ding repair, this two-part polyester filler is ideal for glazing small cracks, chips, and gouges in gelcoat. Simply mix the resin with the cream hardener, apply with a putty knife, let it cure, and sand smooth before painting.
Why a Quick-Fix Kit?
A minor gouge or crack might seem insignificant, but if it’s in a spot that’s constantly exposed to water — like the transom corner or the V area at the bow — it could lead to more serious issues over time. Water intrusion can cause further damage, leading to rot or compromising structural integrity. A quick-fix paint kit acts as a temporary barrier, keeping water out and damage at bay until you can schedule a more thorough repair.
Quick Fix vs. Professional Repair: It’s important to remember that this kit is not intended to replace a full professional repair. It’s a temporary solution, a “band-aid” that buys you time and protects your investment. For larger gouges or extensive gelcoat damage, consult a marine paint pro who can ensure the repair is properly sealed and color-matched.
Until then, keeping a quick-fix paint kit onboard can be a lifesaver — or at least a boat-saver. Consider it part of your essential toolkit, just like your first-aid kit or spare fenders. After all, it’s not a question of if you’ll need it, but when.
###

Image 1: Images one, two, and three are all options for step one of this quick fix. When preparing a boat for painting, choosing the right cleaning and preparation products is crucial for achieving a smooth, long-lasting finish. Sunnyside Acetone is a powerful solvent that excels in heavy-duty cleaning and degreasing. It rapidly evaporates, making it ideal for removing wax, grease, and oil from surfaces before applying primers or paints. Additionally, it can thin resins and epoxies, ensuring proper flow and adhesion. However, due to its aggressive nature, acetone should be used with caution on plastics and certain finishes to prevent surface damage.
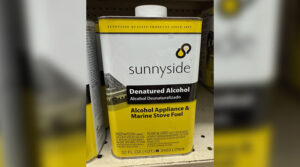
Image 2: For more delicate surfaces or those that require a milder cleaning agent, Sunnyside Denatured Alcohol is a more controlled option. It effectively removes dust, dirt, and contaminants without the harshness of acetone. Ideal for wiping down wood, fiberglass, and metal before painting or varnishing, denatured alcohol evaporates quickly without leaving a residue. It is also commonly used to thin shellac and clean paint tools. Though less aggressive, it is still flammable and should be used with proper ventilation and protective gear.
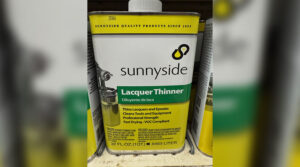
Image 3: Sunnyside Lacquer Thinner is essential for applications involving lacquer-based paints and finishes. It not only thins lacquer for a smooth, even application but also cleans spray guns, brushes, and rollers effectively after use. Additionally, it is a powerful solvent for removing overspray, tar, and old lacquer residues, making it invaluable for refinishing work. Due to its potent formulation, lacquer thinner must be handled carefully to prevent damage to plastic components and ensure a safe work environment.
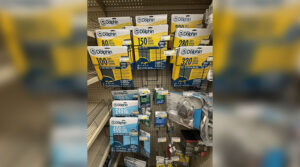
Image 4: When sanding the damaged area, begin with a coarse grit, such as 80 or 100, to effectively smooth the surface. Remove any dust or debris before proceeding to the filler application (refer to image 3). Once the filler has been applied and fully cured, transition to a finer grit, starting with 120 and finishing with 220, to achieve a smooth, even surface.
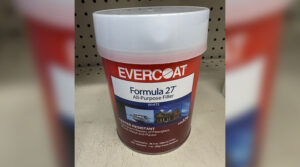
Image 5: Step three involves using Formula 27, a premium white polyester filler designed for reliable and lasting repairs on wood, fiberglass, metal, stucco, cement, and drywall. Its water-resistant formulation effectively fills dents, dings, and gouges without sagging, cracking, or shrinking once cured. The filler can be tinted to match the desired color and includes a white cream hardener for easy application and a smooth, seamless finish.
After sanding the damaged area, apply Formula 27 filler to fill the crevice. The filler is sold with a hardener that activates the substance, allowing it to solidify once dried. To catalyze Formula 27, mix a few drops of the hardener with the filler. Follow the recommended mixing ratios and thoroughly blend to ensure proper activation and optimal curing.
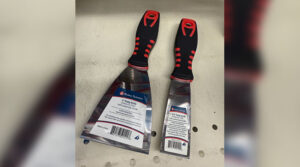
Image 6: A putty knife is your go-to tool when applying Formula 27 filler to a ding on your boat. It helps you spread the filler evenly across the damaged area, pressing it firmly into the crevice to ensure good adhesion and eliminate air pockets. The flat, flexible blade lets you smooth out the filler, feathering the edges to blend seamlessly with the surrounding surface. Once it cures, you’re left with a uniform, level finish that’s ready for sanding and paint.
Important Tip: Be sure to clean your putty knife with acetone immediately after applying the filler. Once the filler hardens, it becomes difficult to remove and can damage the blade.
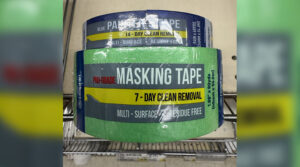
Image 7: When you’re painting a small section on your boat, masking tape is your best friend. It keeps your lines sharp and prevents paint from getting where it shouldn’t — like your hardware, trim, or that pristine gelcoat you just buffed. It’s basically your insurance against sloppy edges and accidental drips. Lay it down, press it tight, and when you’re done, peel it back to reveal a clean, pro-looking finish without any surprises.
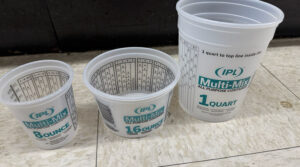
Image 8: A mixing cup with those printed ratios is a game changer when you’re painting your boat, especially if you’re working with multi-part paints or resins. Those lines and numbers make it easy to get the right mix of paint, hardener, and reducer without eyeballing it – and trust me, guessing can mess up your finish. Getting the mix just right is key for a solid cure and a smooth finish. Plus, it saves you from wasting product or ending up with a batch that doesn’t dry right. Keeps things simple, clean, and ending with that professional-quality finish.
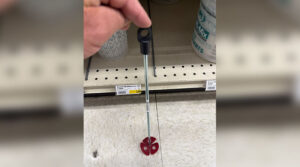
Image 9: A paint mixing wand is a tool designed to attach to a drill and effectively blend paint, primer, or other liquid materials. It features a propeller-like blade that spins rapidly, ensuring thorough mixing and eliminating clumps or inconsistencies in the product. When painting a boat, using a mixing wand helps achieve a uniform consistency in multi-part paints, fillers, or resins, ensuring even application and optimal curing. It’s especially useful for larger quantities of paint or thicker substances that are difficult to stir by hand.
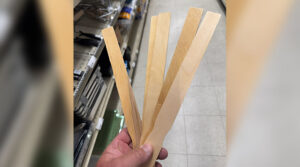
Image 10: If you don’t have a paint mixing wand, a sturdy wooden paint stir stick is a simple and effective alternative. It’s great for smaller batches and can easily blend paint, primer, or filler by hand. For thicker materials or multi-part paints, consider using a disposable plastic spatula or even a clean, flat piece of scrap wood. Just make sure to stir thoroughly, scraping the bottom and sides of the container to ensure a consistent mix and prevent settling.
Imagine you’re picking up a quart of marine paint from West Marine that’s been sitting on the shelf for a while. Over time, the pigments and solvents in the paint can separate, with the heavier pigments settling at the bottom and the thinner solvents rising to the top. If you just pop the lid and start applying it without properly mixing, you’re likely to get uneven coverage, inconsistent color, and poor adhesion. Even for a minor repair, taking the time to thoroughly mix the paint — whether with a mixing wand, a stir stick, or a sturdy spatula — ensures the formula is properly blended and performs the way it’s supposed to.
D
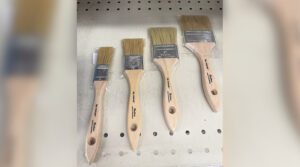
Image 11: When you’re touching up your boat, having a few different brush sizes on hand makes a big difference. Small brushes are perfect for those tight spots and little nicks — they let you get in there without slapping too much paint around. Medium brushes are great for rails and trim, giving you good coverage without losing control. And when you’re dealing with bigger areas like the hull or deck, grab a larger brush to cover more ground quickly and keep things smooth. Using the right size brush keeps you from ending up with drips, streaks, or uneven spots.